
How to Create Line Art from Photos with AI
On this page
Share
You have a photo you love — maybe a portrait, a street scene, or your dog looking majestic on the couch. You want to turn it into clean line art for a poster, a coloring page, or a tattoo design. A few years ago, you'd need hours in Photoshop tracing edges by hand. Now, AI can do it in under a minute.
This guide walks you through the full process of creating line art from photos using AI, from picking the right tool to fine-tuning your results.
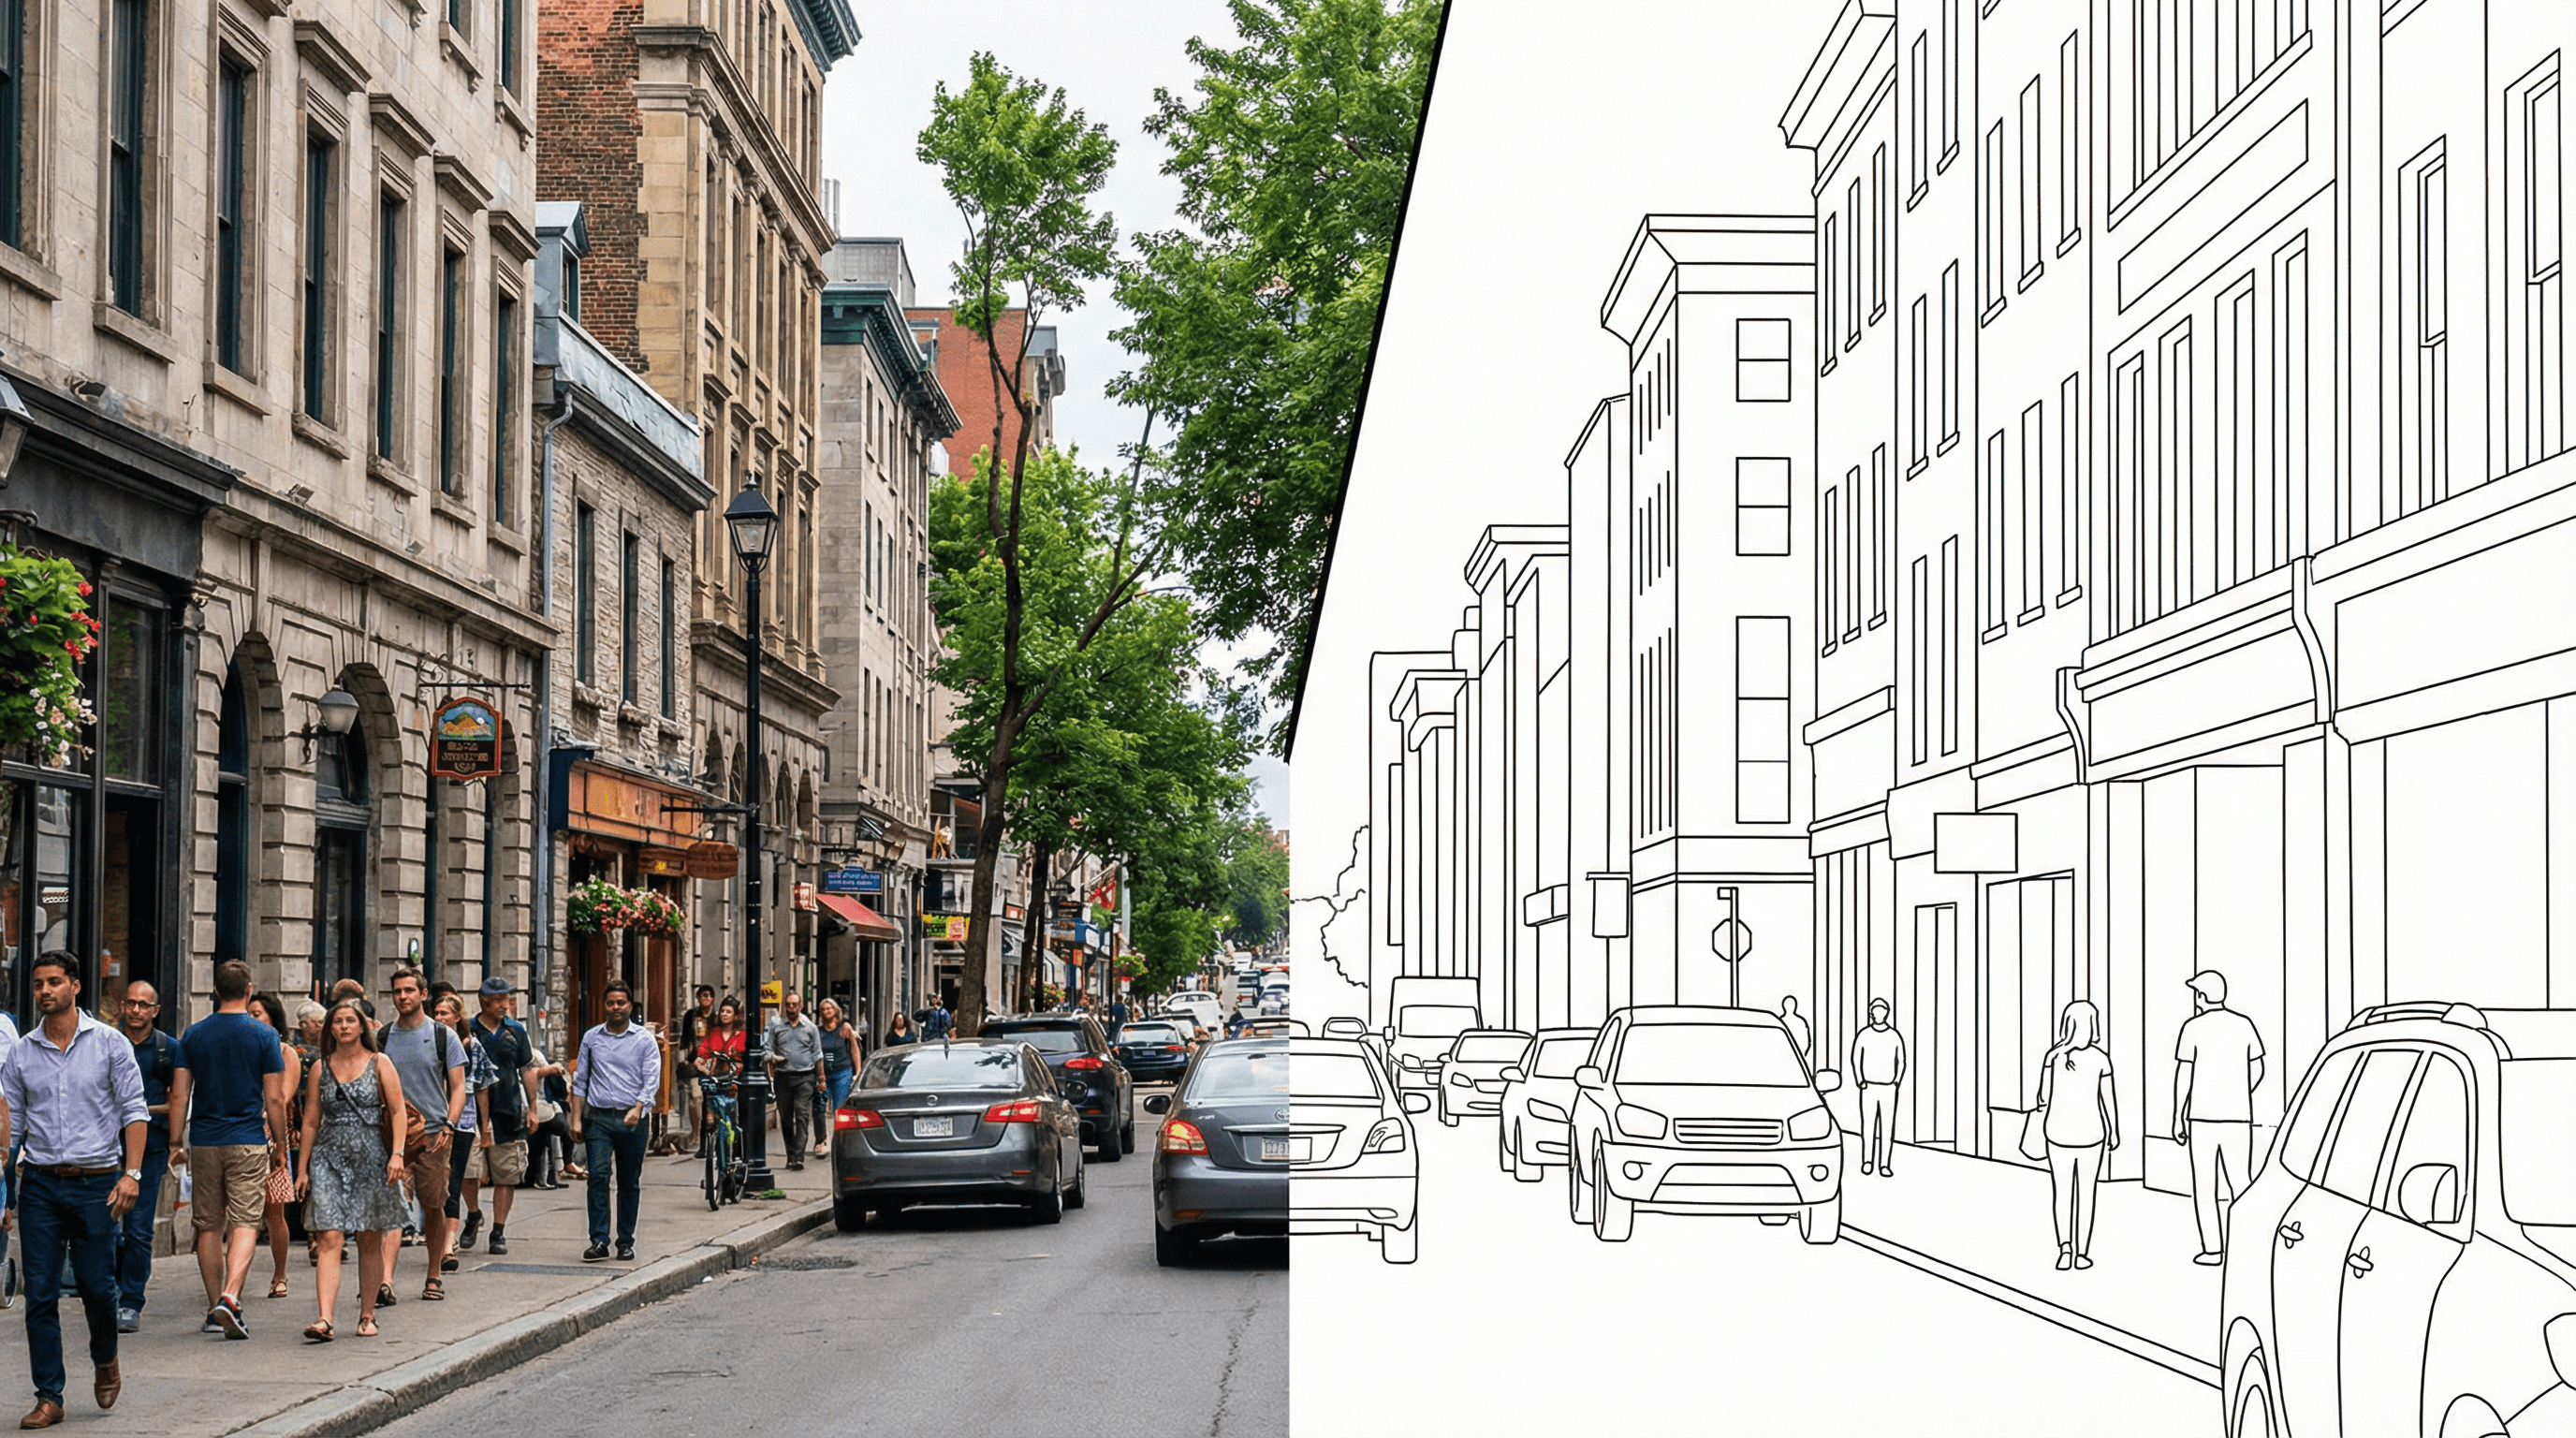
Table of Contents
- Why Turn Photos into Line Art?
- Step-by-Step Guide to Creating Line Art from Photos
- Pro Tips for Better Line Art Results
- FAQ
- Conclusion
Why Turn Photos into Line Art?
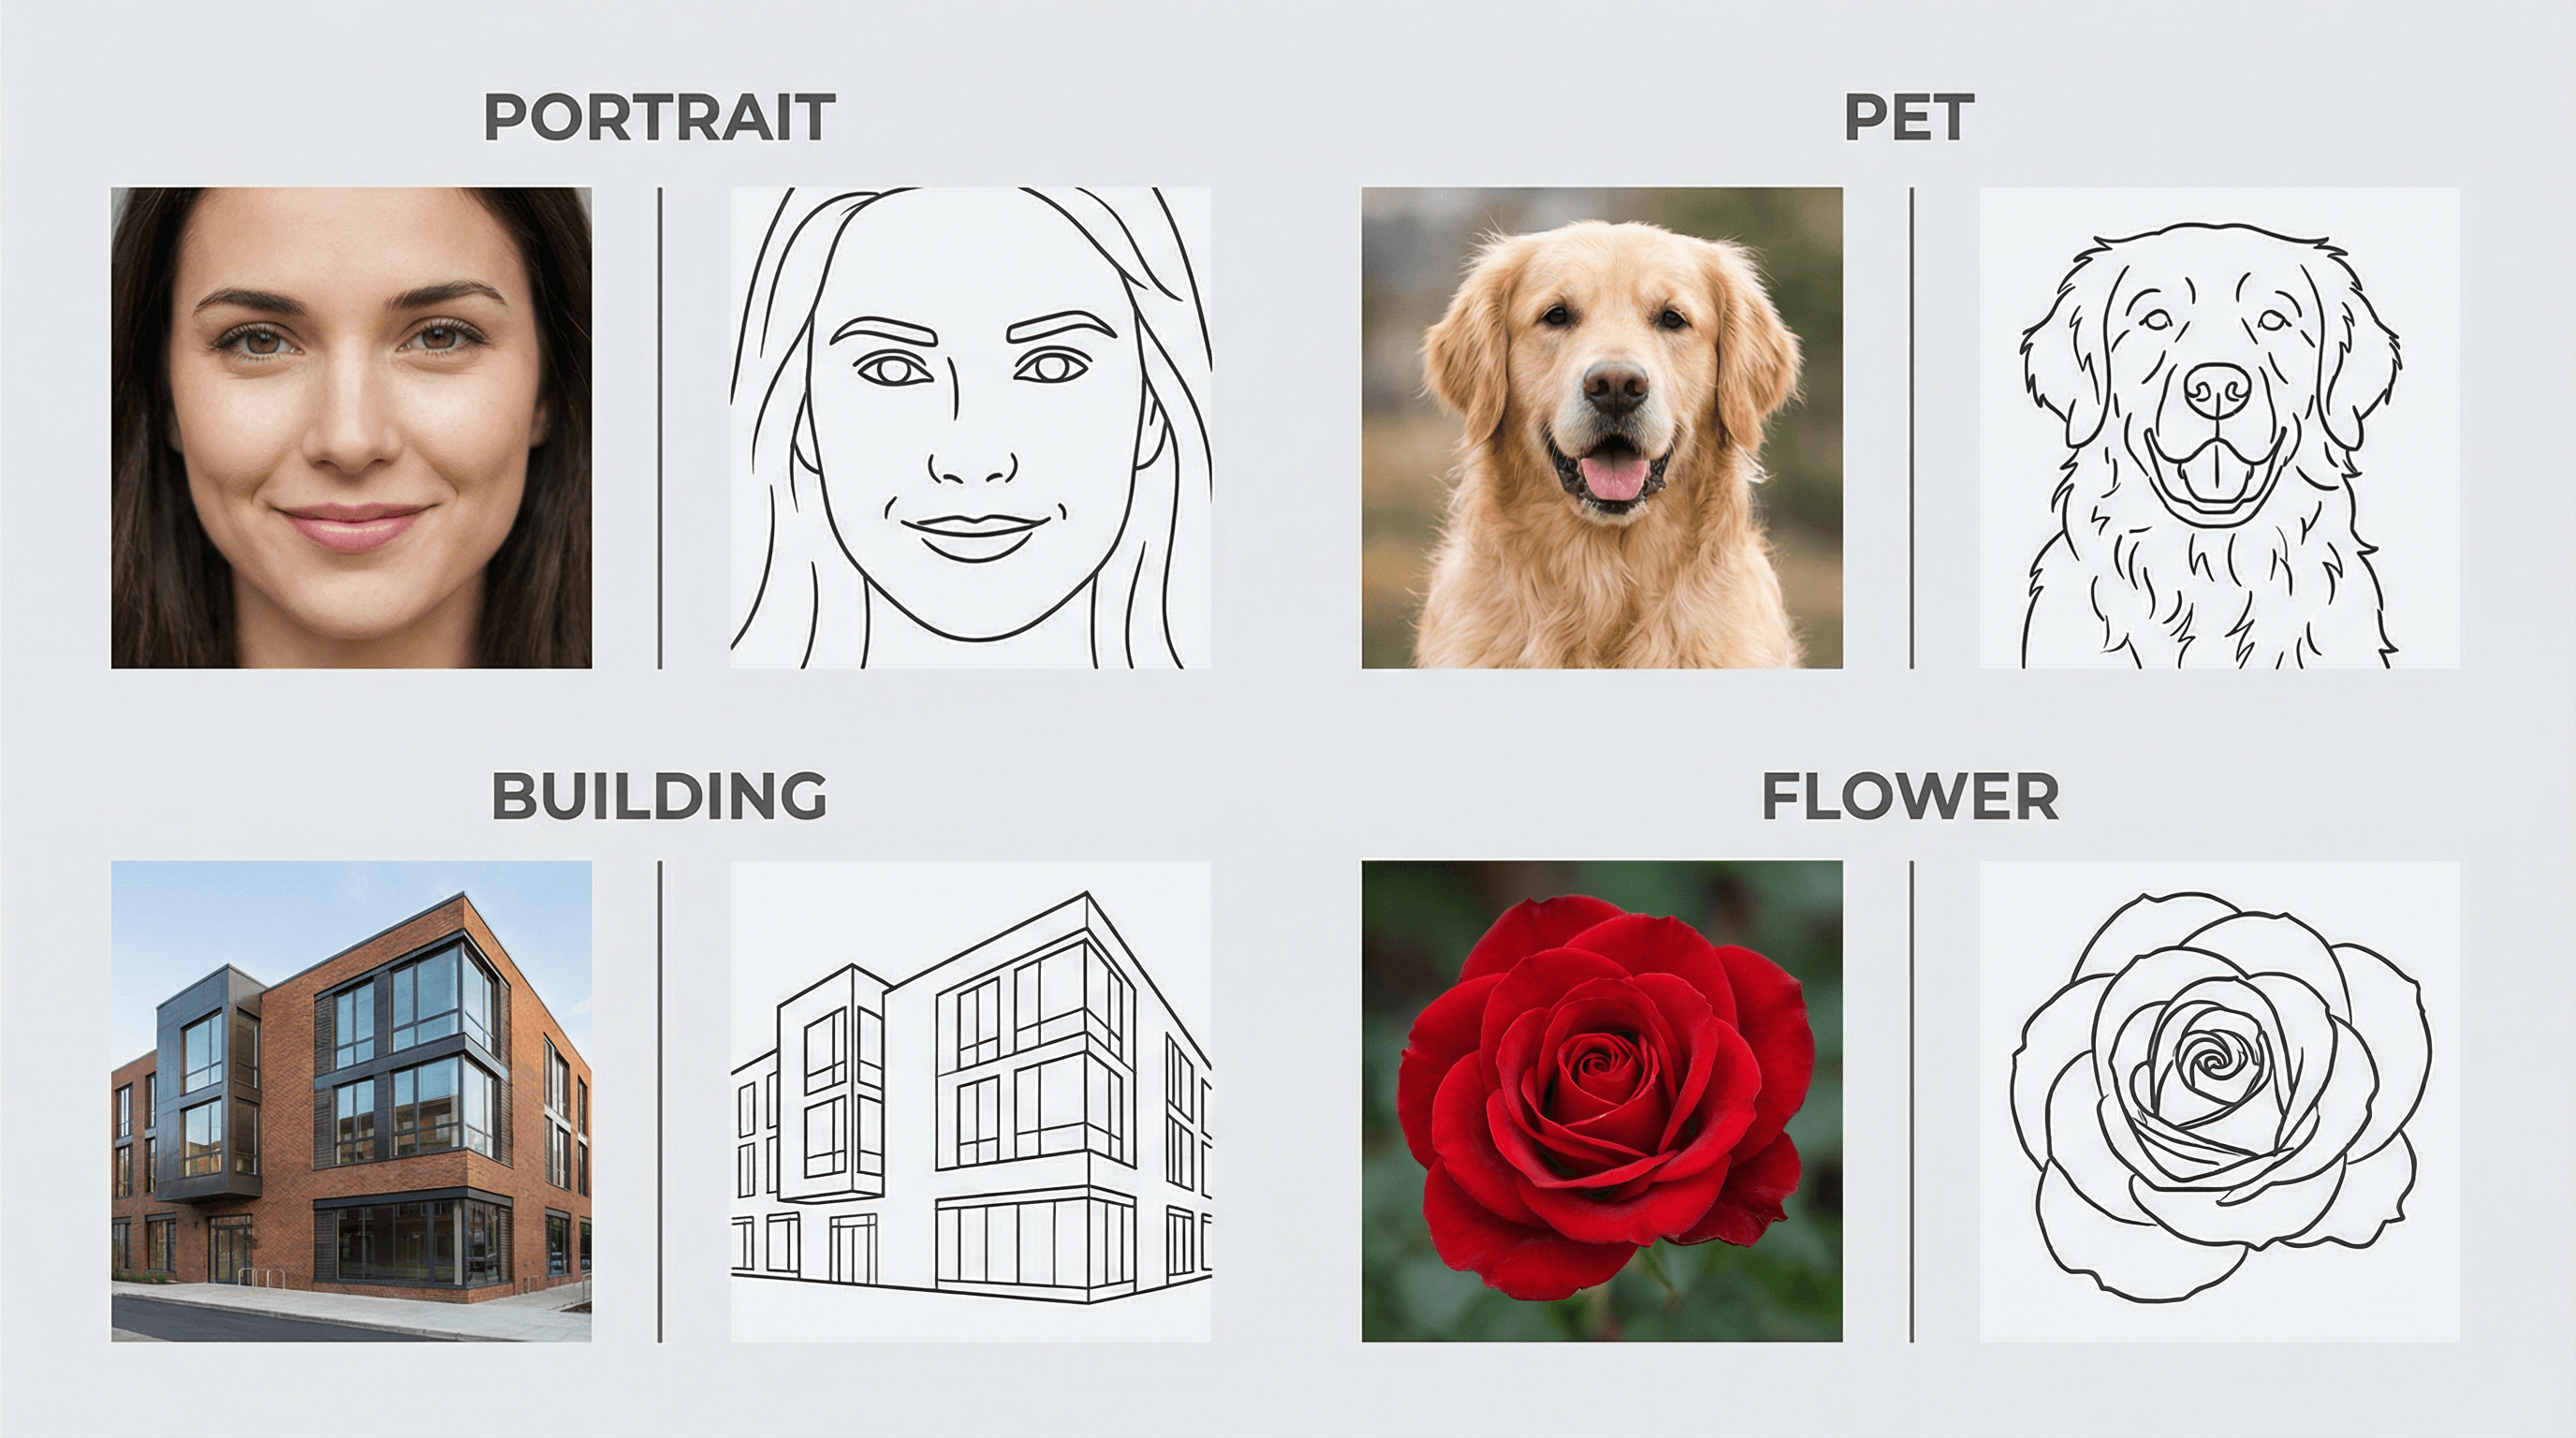
Line art strips a photo down to its essential shapes. It's used across design, illustration, and print — from wedding invitations and children's coloring books to logo references and architectural sketches.
For designers and artists, converting photos to line drawings saves hours of manual tracing. Instead of painstakingly outlining every edge in Illustrator, you get a clean starting point in seconds. From there, you can refine, color, or stylize the output however you want.
There's also a growing demand for line art in social media content. Minimalist line drawings perform well on Instagram and Pinterest because they're visually striking and easy to print on merchandise like t-shirts and tote bags.
Step-by-Step Guide to Creating Line Art from Photos
Step 1: Choose a High-Contrast Photo
The quality of your line art depends heavily on your source photo. Pick an image with clear edges and good contrast between the subject and background. Portraits with even lighting, product shots on clean backgrounds, and architectural photos all work well.
Avoid photos that are blurry, low-resolution, or have busy backgrounds — the AI will struggle to distinguish important edges from noise.
Step 2: Select an AI Line Art Tool
Several AI tools can convert photos to line drawings. Your choice depends on what style of line art you need:
- Online converters work best for quick, one-off conversions. Tools like Sketch To let you upload a photo and get a line art version within seconds — no software to install.
- Desktop apps like Photoshop (with neural filters) give you more control over line weight and detail level.
- Open-source models on platforms like Replicate or Hugging Face offer the most customization if you're comfortable with code.
For most people, an online AI tool hits the right balance of speed and quality.
Step 3: Upload and Configure Settings
Once you've picked your tool, upload your photo. Most AI line art generators let you adjust a few settings:
- Line thickness: Thinner lines work for detailed subjects; thicker lines suit bold, graphic styles.
- Detail level: Higher detail preserves more of the original photo's texture; lower detail gives you cleaner, more abstract results.
- Output format: PNG with a transparent background is ideal if you plan to layer the line art over other designs.
Start with the default settings and adjust from there. You'll often get a usable result on the first try.
Step 4: Generate and Review the Output
Hit generate and wait a few seconds. When the result appears, zoom in to check:
- Are the main edges clean and well-defined?
- Did the AI miss any important details?
- Are there noisy lines from background elements you don't want?
If the result isn't quite right, try adjusting the detail level or uploading a higher-contrast version of your photo.
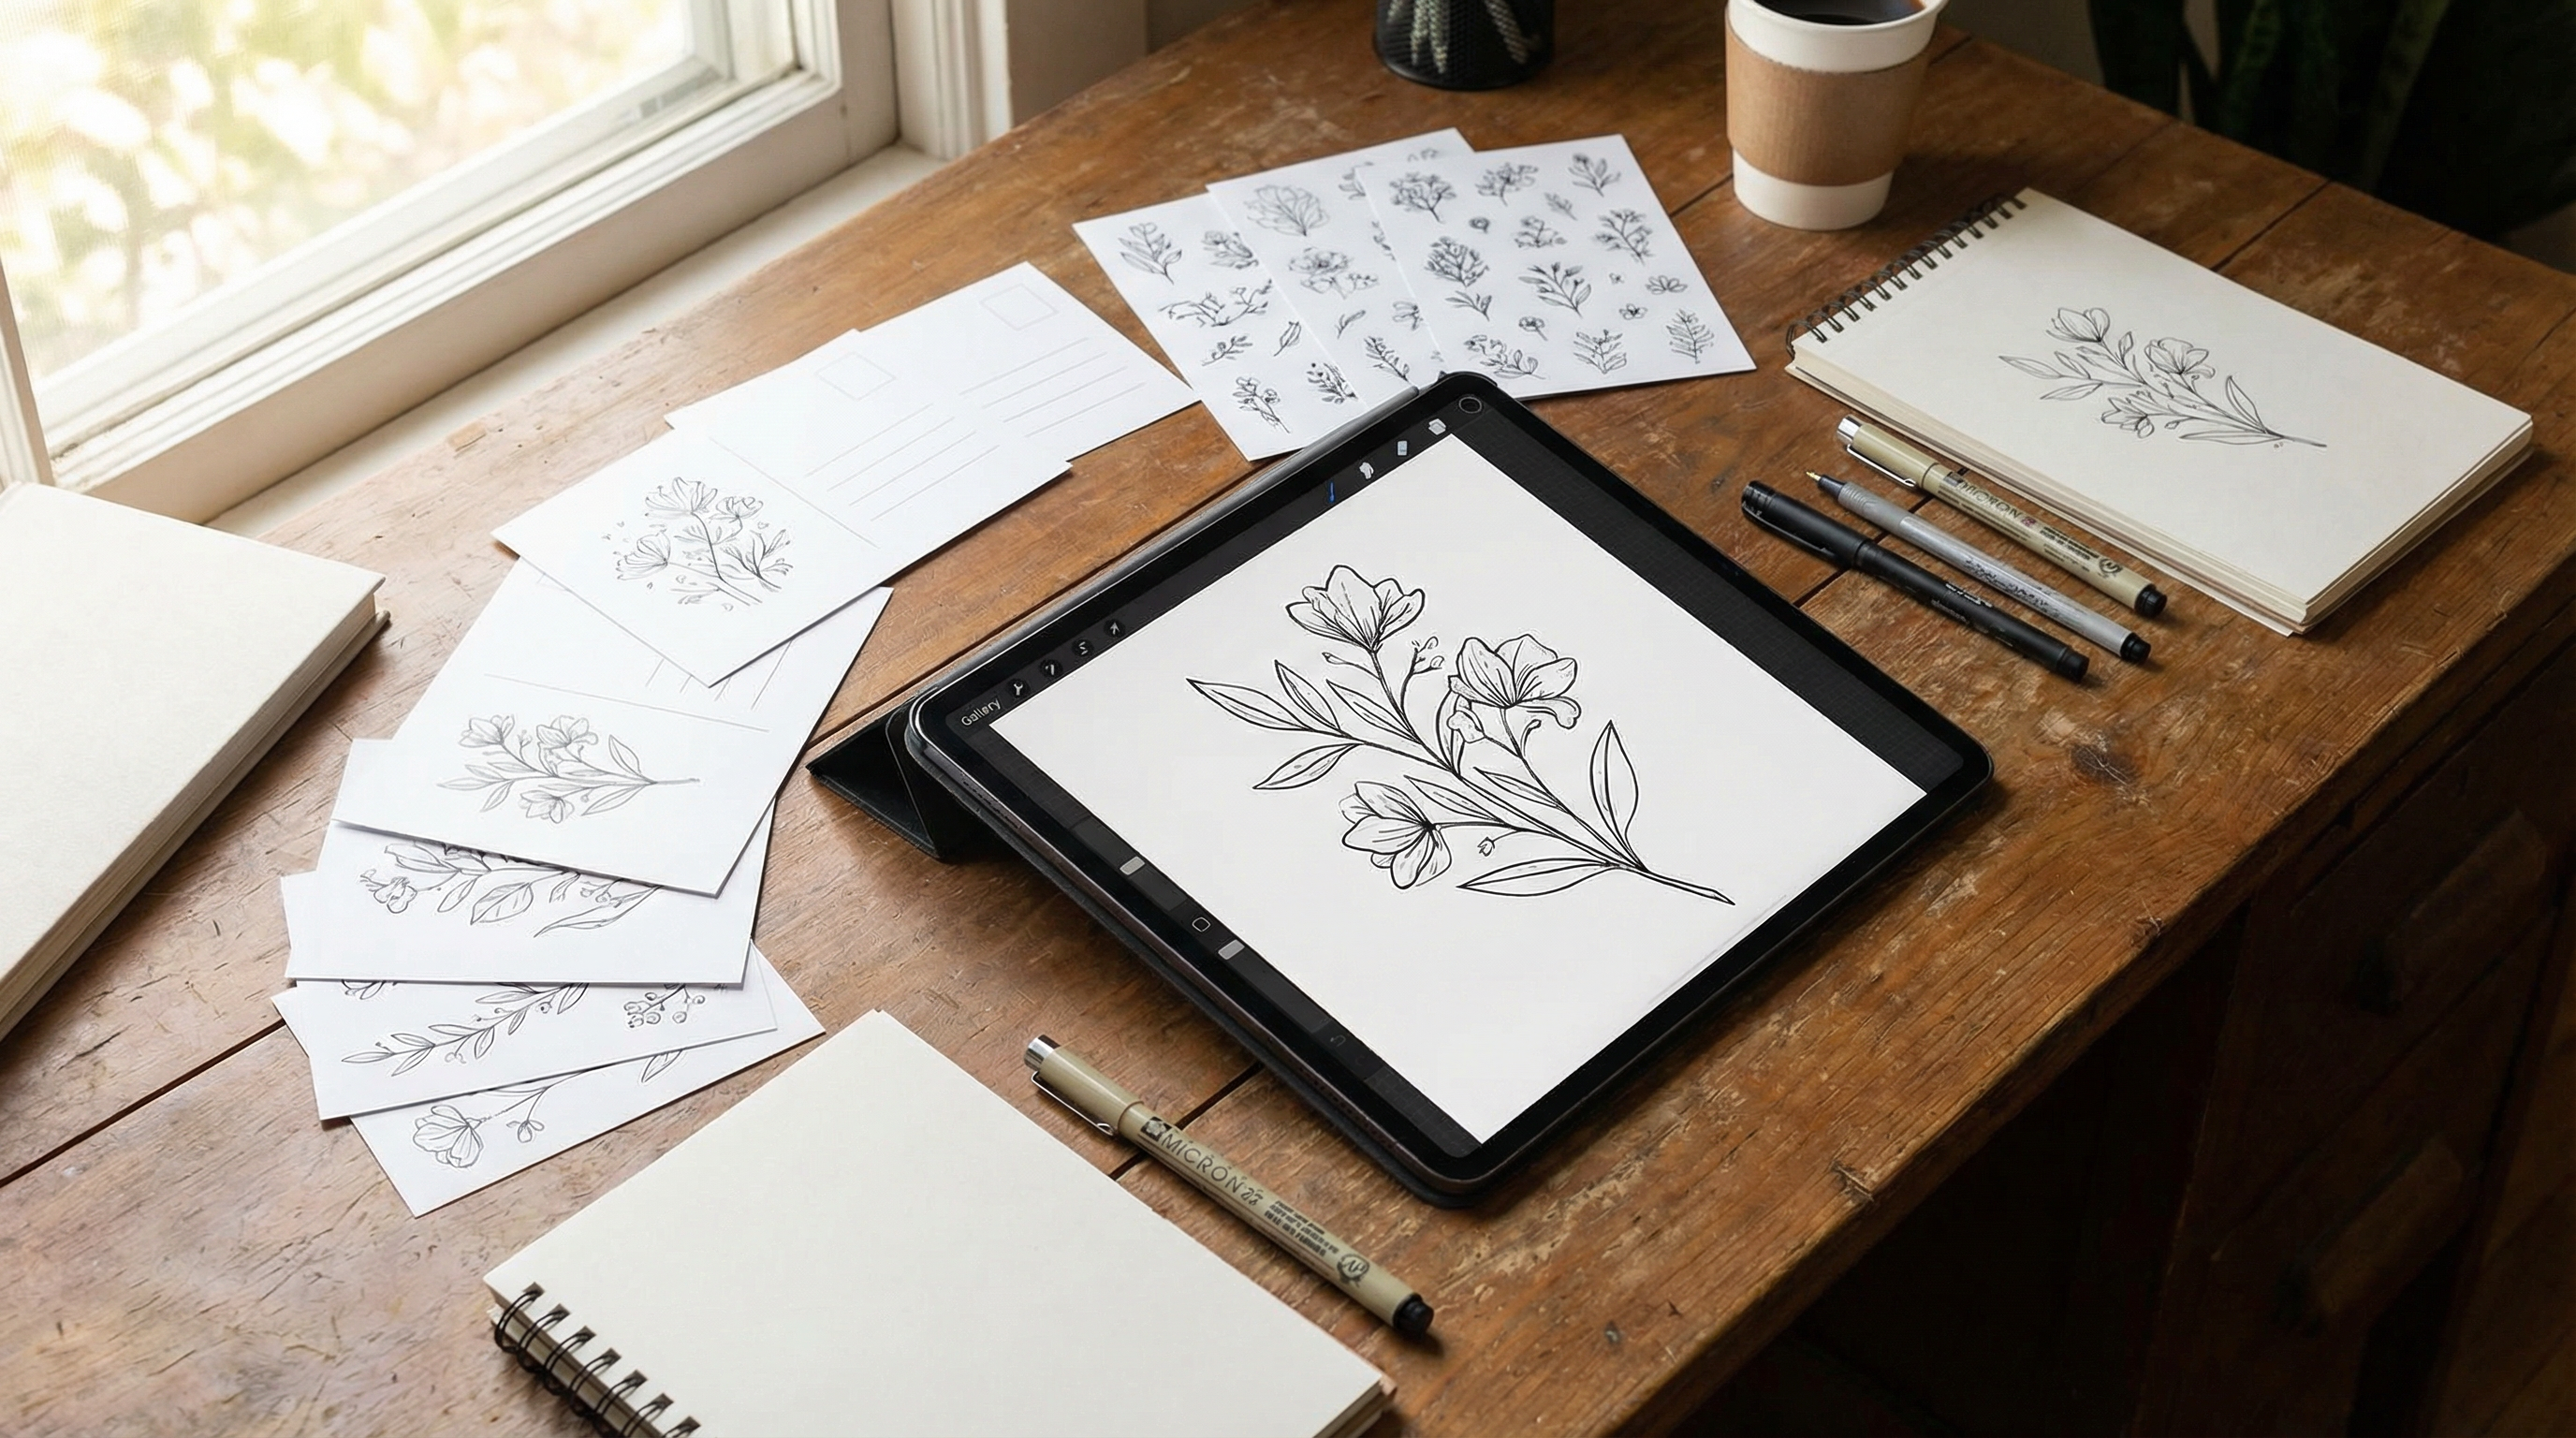
Step 5: Refine and Export
Download your line art and open it in your preferred editor (Photoshop, Illustrator, Figma, or even Canva). Common refinements include:
- Removing stray lines or artifacts
- Adjusting line weight uniformly
- Adding color fills to specific areas
- Combining multiple line art pieces into a composition
Export in the format your project needs — SVG for scalable graphics, PNG for web use, or PDF for print.
Pro Tips for Better Line Art Results
-
Increase photo contrast before uploading. A quick levels adjustment in any photo editor makes edges more distinct, which gives the AI clearer boundaries to trace.
-
Crop tightly around your subject. Removing unnecessary background reduces visual noise and produces cleaner line art.
-
Try multiple tools and compare. Each AI model interprets edges differently. Running the same photo through two or three tools often reveals which one best captures the style you want.
-
Use black and white source photos for the cleanest results. Converting your photo to grayscale before processing removes color-related confusion for the AI.
-
Save your original settings. When you find a configuration that works well for a specific type of photo (portraits, landscapes, products), note it down so you can reproduce the style later.
FAQ
Can I create line art from any photo?
Yes, but results vary based on photo quality. High-contrast images with clear subjects produce the cleanest line art. Blurry or low-resolution photos tend to generate noisy, unclear lines.
Is AI-generated line art good enough for professional use?
For most applications, yes. AI line art works well as a starting point for illustrations, coloring pages, and design mockups. Professional illustrators often use AI output as a base layer, then refine details by hand.
What's the difference between line art and a sketch?
Line art uses clean, consistent lines with no shading or texture — think comic book inking or architectural drawings. Sketches are looser, with varying line weights and sometimes include light shading. Most AI photo-to-line-art tools produce true line art by default.
Do I need to pay for AI line art tools?
Many tools offer free tiers with limited conversions. Paid plans typically give you higher resolution output, batch processing, and more style options. For occasional use, free tools are usually sufficient.
What file format should I save line art in?
PNG works for most digital uses. If you need to scale the art without losing quality (for print or large displays), export as SVG. For print production, PDF is standard.
Conclusion
Creating line art from photos with AI is straightforward: pick a clear photo, choose a tool that fits your needs, and generate. The whole process takes minutes, not hours.
If your first result isn't perfect, adjust the contrast of your source image or try a different detail setting. Most people land on a result they're happy with within two or three attempts.
Ready to try it? Grab a photo and run it through an AI line art tool — you might be surprised how clean the output looks on the first pass.
Transform Your Images with AI
Turn sketches into stunning images, remove backgrounds, swap faces, and more — all powered by AI.
Try Sketch To FreeShare
Sketch To
Tech writer covering AI tools, image processing, and creative workflows.
Related Articles

Claude Design Workflow: Pair It With Sketch-to-Image AI
Build a faster Claude design workflow: use Claude for ideation and copy, Sketch To to render sketches into images, and Figma where it still wins.

Sketch to Image AI Layout Control: A How-To Guide
Learn why sketches give stronger layout control than text prompts. A step-by-step sketch-to-image AI workflow for design-ready images.

How to Turn Sketches into Realistic AI Avatars
Learn how to turn any hand-drawn sketch into a realistic AI avatar in under 5 minutes. Step-by-step guide with pro tips for stunning results.