
From Sketch to Motion: AI Image to Video Workflow
On this page
Share
You generated a stunning AI portrait last night. It's sitting in your camera roll with zero views. On TikTok, Instagram Reels, and YouTube Shorts, static images can't hold a thumb-scroller for more than a second — video does.
This guide walks you through a complete AI image to video workflow: generate a stylized still with sketch-to → animate it with an AI video tool → export it in the right format for each social platform. Once dialed in, the full loop takes about 10 minutes per clip.
Last updated: 2026-04-22

Table of Contents
- Why Turn AI Images into Videos?
- The 3-Step AI Image to Video Workflow
- Step 1: Generate Stylized Images with Sketch To
- Step 2: Animate the Image into Video
- Step 3: Export for TikTok, Reels, and Shorts
- Pro Tips for Better Results
- FAQ
- Conclusion
Why Turn AI Images into Videos?
AI image to video turns a one-second glance into a 5-to-10-second watch, which is the single biggest lever you have for social retention. Algorithms on TikTok, Reels, and Shorts reward watch time above almost everything else — an animated still beats a static carousel at every step of the feed.
Three practical reasons to add motion to your AI art:
- Retention and reach. Video posts consistently pull 2–3× the reach of static images in short-form feeds. A subtle camera pan or a drifting-cloud loop is enough to double your average watch time.
- Content density. One prompt → one still image → one 8-second video. The same creative idea now gives you assets for a post, a Reel, and a Short. You triple your output without tripling your effort.
- Creative identity. Static AI art looks like everyone else's AI art. Movement — hair drift, light flicker, a slow zoom — is where your creative voice actually shows up.
For indie creators posting 5–10 times a week, the math is obvious: if animating a still takes 2 minutes and gives you 2× the views, it's the highest-ROI 2 minutes of your day.
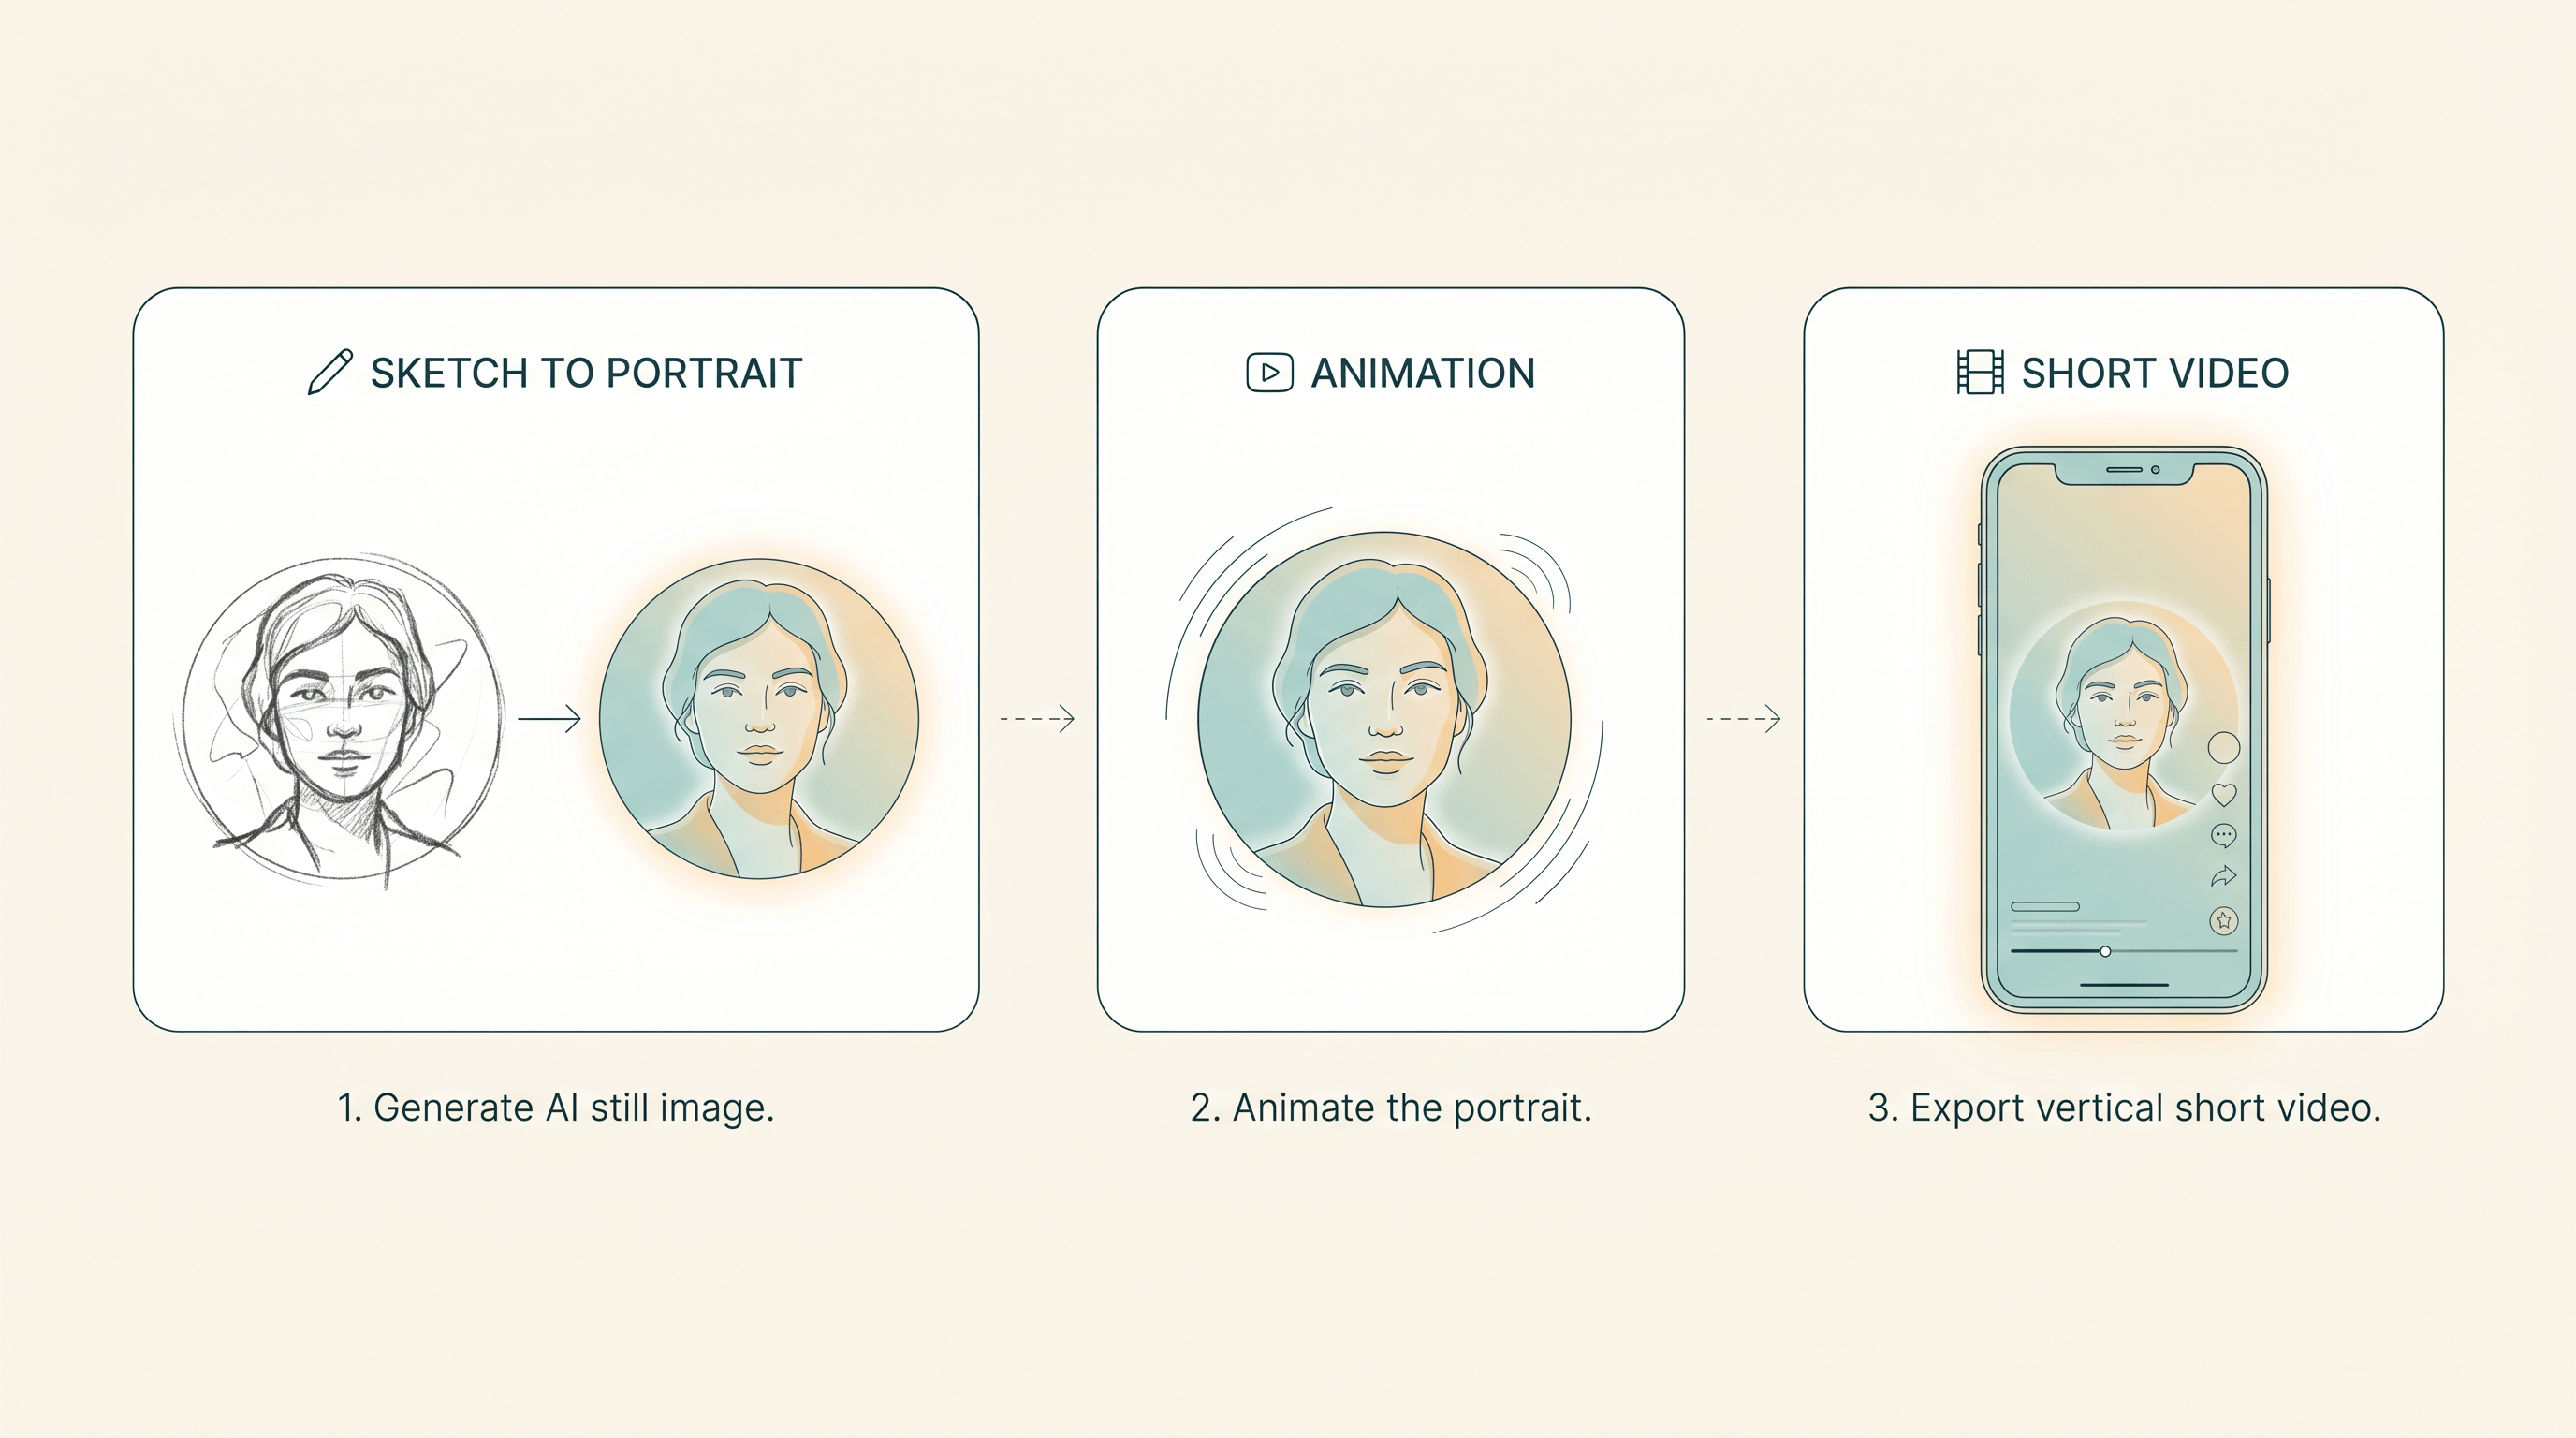
The 3-Step AI Image to Video Workflow
The full AI image to video workflow breaks into three steps:
- Generate the still — use an image model (we'll use Sketch To) to produce a stylized frame with clean composition and a clear subject.
- Animate it — feed the still into an AI image-to-video tool with a short motion prompt.
- Export and adapt — crop to 9:16, trim to platform length, add captions and sound.
Each step takes 1–4 minutes. Total per clip: under 10 minutes once the workflow is dialed in.
Step 1: Generate Stylized Images with Sketch To
Start by generating a still that will actually animate well. Not every AI image turns into a good video — composition and subject clarity determine how clean the motion looks.
Open Sketch To and use the Sketch to Image AI feature with the Professional Model. Upload a rough sketch or a reference photo, then write a prompt that describes the final look you want.
Three prompt examples that animate well:
- Portrait: "A young woman with long dark hair, cinematic side lighting, soft focus background, 35mm film look, warm golden hour, photorealistic."
- Landscape: "A misty pine forest at dawn, soft volumetric light through the trees, dew on leaves, cinematic wide shot, muted teal and amber palette."
- Product hero: "A ceramic coffee cup on a wooden table, steam rising, morning light from the left, shallow depth of field, minimalist composition."
In our testing, prompts that call out lighting, depth of field, and a specific camera style produce stills that animate more convincingly than flat, graphic prompts.
Tips for picking images that animate well:
- Clear subject, simple background. Busy backgrounds tend to warp or flicker when animated. A single focal point in front of soft negative space animates cleanly.
- Leave headroom and breathing room. AI video models often crop or pan. If your subject is jammed against the frame edges, the motion tool has nowhere to go.
- Mind the depth cues. Foreground/midground/background separation gives the video tool something to parallax. Flat images tend to feel wobbly when animated.
- Avoid text and small faces. AI video tools still struggle with stable typography and distant facial features. Keep text out entirely, and keep faces within the central third of the frame.
Download the still as a high-resolution PNG before moving on — most image-to-video tools cap input at 1024–1920px, and compressed JPEGs can cause banding in the output.
If you want to explore different styles for the same sketch, also check out Sketch To's Image Upscaler to push a 1024px output to 2K before animating — more pixels give the video model more to work with.
Step 2: Animate the Image into Video
AI image to video tools take your still plus a short motion prompt and output a 3–10 second clip. The category has matured fast — most tools now generate usable motion on the first try.
Common tool categories worth knowing:
- General-purpose image-to-video SaaS — web tools that accept an image + prompt and return an MP4. This is where most creators start. Options like Runway Gen-4, Kling, Pika, and tools like aifruit all fit here and cover most use cases without any local setup.
- Open-source models (Stable Video Diffusion, CogVideoX) — run locally or on a GPU rental. Maximum control, steepest learning curve.
- Platform-native animators — CapCut's AI animator, TikTok's built-in motion effects. Fastest path, but the output tends to look generic.
For most creators, a web-based image-to-video tool hits the right balance: fast, no install, and the output quality has closed most of the gap with desktop workflows.
Motion prompts that work:
Short, specific motion prompts beat long creative ones. The video model is interpreting movement, not re-imagining the scene.
gentle sway— subtle movement in hair, fabric, leaves. Safe default for portraits and nature shots.slow camera pan left— cinematic horizontal movement. Works well for landscapes and wide product shots.slow zoom in— builds focus on a subject. Good for portrait-style reveals.camera orbit around subject— rotational movement. Great for product shots.wind through hair, soft clouds drifting— stacks two subtle motions. Use only when the image has both elements cleanly separated.
Keep each generation under 6 seconds on your first try. Longer clips are more likely to drift into uncanny territory — limbs warping, backgrounds dissolving. If you need a 10-second Reel, generate two 5-second clips and stitch them.
Export the clip as MP4 at the highest resolution the tool offers (most output 720p or 1080p).
Step 3: Export for TikTok, Reels, and Shorts
Each platform wants a slightly different spec. Getting this right is the difference between a clip that looks native and one the algorithm quietly suppresses.
| Platform | Aspect | Resolution | Length | Format |
|---|---|---|---|---|
| TikTok | 9:16 | 1080×1920 | 3–60s (sweet spot 15–30s) | MP4, H.264 |
| Instagram Reels | 9:16 | 1080×1920 | Up to 90s (sweet spot 15–30s) | MP4, H.264 |
| YouTube Shorts | 9:16 | 1080×1920 | Up to 60s | MP4, H.264 |
Cropping to 9:16. Most AI image-to-video tools output 16:9 or 1:1. Use CapCut, Premiere, or even the native TikTok editor to re-crop. Keep your subject in the central third — this is the "safe zone" each platform uses for UI overlays (captions, share buttons, follow prompts).
Length strategy:
- A single 5-second AI clip is too short on its own — viewers bounce before the hook lands.
- Stack 2–3 animated stills back-to-back (total 15–30s), with text-on-screen explaining the idea.
- Loop the final clip so the end blends into the beginning. Platforms count replays as watch time, and seamless loops lift the average significantly.
Captions and audio. Always add captions — 85% of short-form video is watched on mute. For audio, pick a trending sound from each platform's library; this is the single biggest reach multiplier after aspect ratio.
Pro Tips for Better Results
- Batch your stills first. Generate 10 images in one Sketch To session, then batch-animate them the next day. Context-switching between prompting and animating slows you down.
- Test motion on a throwaway still first. AI video credits aren't free. Burn a cheap test on a rough image to lock in your prompt before spending credits on your hero frame.
- Write the caption before you animate. If you can't summarize the clip in one sentence, the motion isn't doing enough. Rewrite the motion prompt.
- Keep a "winners" folder. Every time a clip breaks 10K views, save the still, the motion prompt, and the caption together. Two months in, you'll start to see your own pattern.
- Export twice: native + backup. Save both a 9:16 vertical and a 1:1 square. You'll reuse the square for Instagram feed posts and LinkedIn.
FAQ
What's the difference between AI image to video and a full AI video generator?
AI image to video starts from an image you already have and adds motion. Full AI video generators (Sora, Veo) start from a text prompt and build the video from scratch. Image-to-video is cheaper, faster, and gives you much more control over the final look — you've already locked in the composition.
What resolution do I need for social media?
1080×1920 (9:16) is the target for TikTok, Reels, and Shorts. You can start from a 720p AI video and upscale, but generating at 1080p directly gives cleaner results. Avoid uploading anything below 720p — platforms will compress it further and it ends up noticeably worse than competing posts.
Is AI video content allowed on TikTok, Instagram, and YouTube?
Yes, all three platforms allow AI-generated content. TikTok and Instagram require you to label realistic AI content (there's a toggle when posting). YouTube Shorts has a similar disclosure rule under the "altered content" field. Fantasy, stylized, or clearly non-realistic AI art doesn't need labeling on any platform.
Who owns the copyright on AI-generated videos?
It depends on the tool. Most commercial image-to-video SaaS (Runway, Pika, etc.) grant you commercial rights to the output. Open-source models output under the model's license — usually permissive. Always check the specific tool's terms before using a clip in a paid brand deal.
How much does an AI image to video workflow cost per clip?
Roughly $0.30–$1.50 per final 5-second clip, combining image generation (~$0.05–$0.20) and video generation ($0.25–$1.30). Budget tools and open-source setups can push this under $0.10 per clip, at the cost of output quality.
Can I animate the same image multiple ways?
Yes, and you should. Generate 3–5 variants of each still with different motion prompts — zoom, pan, sway, orbit. You get 3–5 pieces of content from one image, and some motions will outperform others in ways you can't predict from the still.
Conclusion
The AI image to video workflow is now short enough to fit into a 10-minute coffee break: generate a still, animate it, crop for vertical, post. Creators who run this loop once a day build a content library faster than anyone still shooting on a phone.
Start with one image you've already generated. Pick the simplest motion prompt (gentle sway). Cut it to 9:16. Post it. Iterate from whatever lands.
Ready to generate your first frame? Try Sketch To free → — upload a sketch, pick the Professional Model, and you'll have a publish-ready still in about 10 seconds.
Transform Your Images with AI
Turn sketches into stunning images, remove backgrounds, swap faces, and more — all powered by AI.
Try Sketch To FreeShare
Sketch To
Tech writer covering AI tools, image processing, and creative workflows.
Related Articles

Claude Design Workflow: Pair It With Sketch-to-Image AI
Build a faster Claude design workflow: use Claude for ideation and copy, Sketch To to render sketches into images, and Figma where it still wins.

Sketch to Image AI Layout Control: A How-To Guide
Learn why sketches give stronger layout control than text prompts. A step-by-step sketch-to-image AI workflow for design-ready images.

How to Turn Sketches into Realistic AI Avatars
Learn how to turn any hand-drawn sketch into a realistic AI avatar in under 5 minutes. Step-by-step guide with pro tips for stunning results.