How to Turn a Photo into a Perler Bead Pattern (Free Beginner Tutorial)
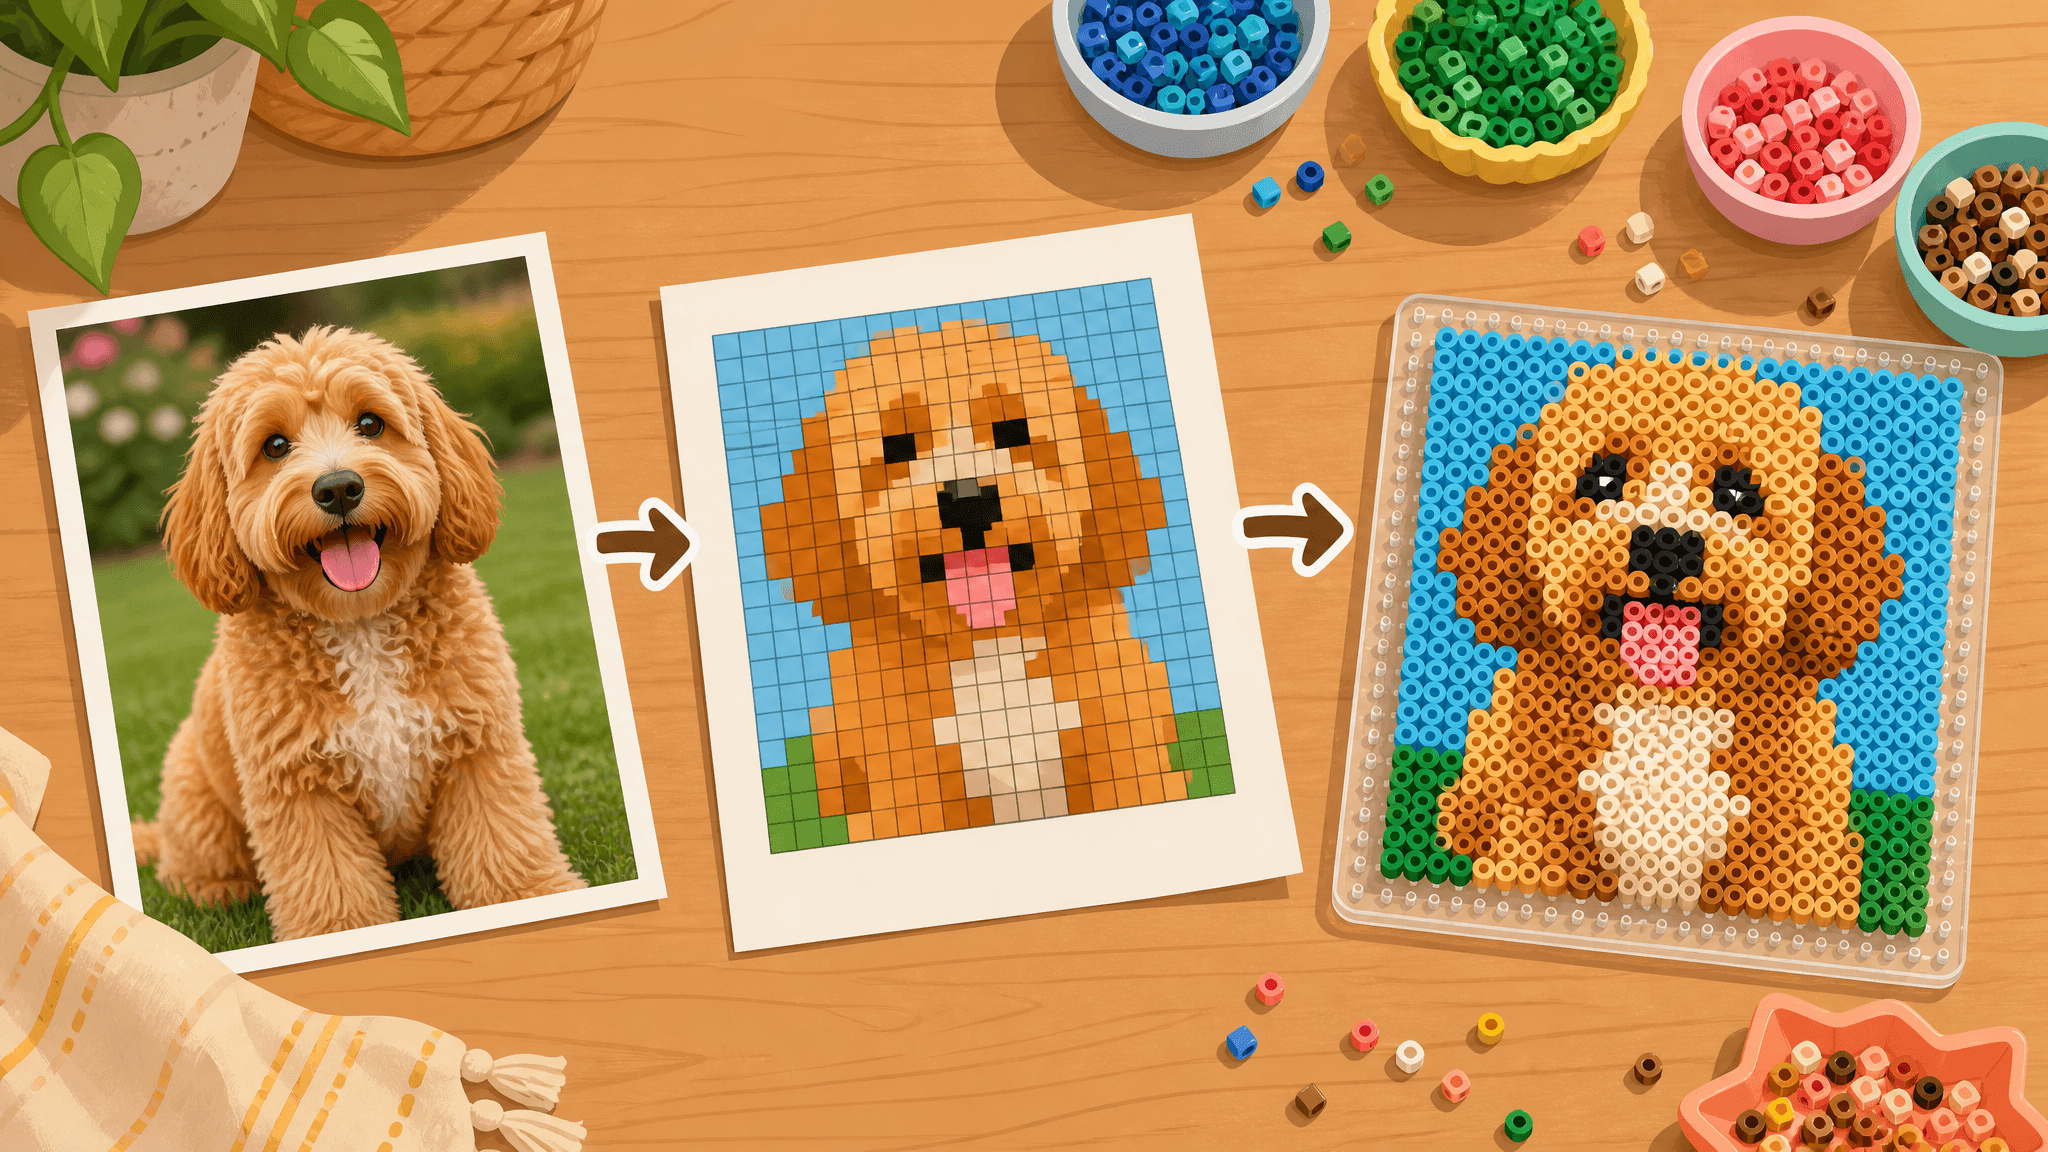
That photo of your pet, a favorite cartoon character, or a game sprite can become a printable perler bead pattern you can follow bead by bead. The whole process takes four steps: pick a suitable photo, generate the pattern with a free online tool, print it and place your beads on the board, then fuse both sides with an iron. Every step below follows the order we tested — generating the pattern took about 40 seconds from upload to download, the free signup credits cover two patterns, and nothing needs installing.
Before you start: pick the right photo and gather supplies
Your photo sets the ceiling for the pattern. Images with one clear subject, a clean background, and limited colors convert best: a headshot, a single character, or a simple heart beats a group photo every time. Crop away distracting background before uploading so the subject fills the frame.
The supply list is short:
- Fuse beads (a mixed-color bucket of standard 5mm beads is the usual starting point)
- One 29×29 square pegboard (holds about 841 beads — the size most beginners start with)
- A household iron + ironing paper (the reusable high-heat paper made for fuse beads)
- Optional: tweezers (near-mandatory for mini beads)
Step 1: Turn your photo into a bead pattern (tested)
You don't need to design anything by hand. Open the free perler bead pattern generator and the workflow is three steps: upload, pick a style, download.
Here's the process exactly as we ran it: open the tool, drag your photo into the upload area, then choose a bead size and a color style. The tool offers three sizes — mini, standard, and jumbo beads — and styles including Classic Grid, Soft Pastel, Neon Glow, Earthy Natural, and Mono Classic. The same photo produces completely different patterns depending on the style. Click "Transform Image · 2 credits," and the grid pattern is ready in about 40 seconds; hit Download to save the high-resolution version. No errors at any point.
About cost: new accounts get 4 free credits, each conversion costs 2, so you can try it twice for free. Every pattern you generate is saved to your account's History, so you can go back and re-download at any time.
One tip: if you plan to fill a 29×29 board, generate with a chunky style like Classic Grid so the bead count and printed size match the board; switch to mini-bead mode later for finer small pieces.
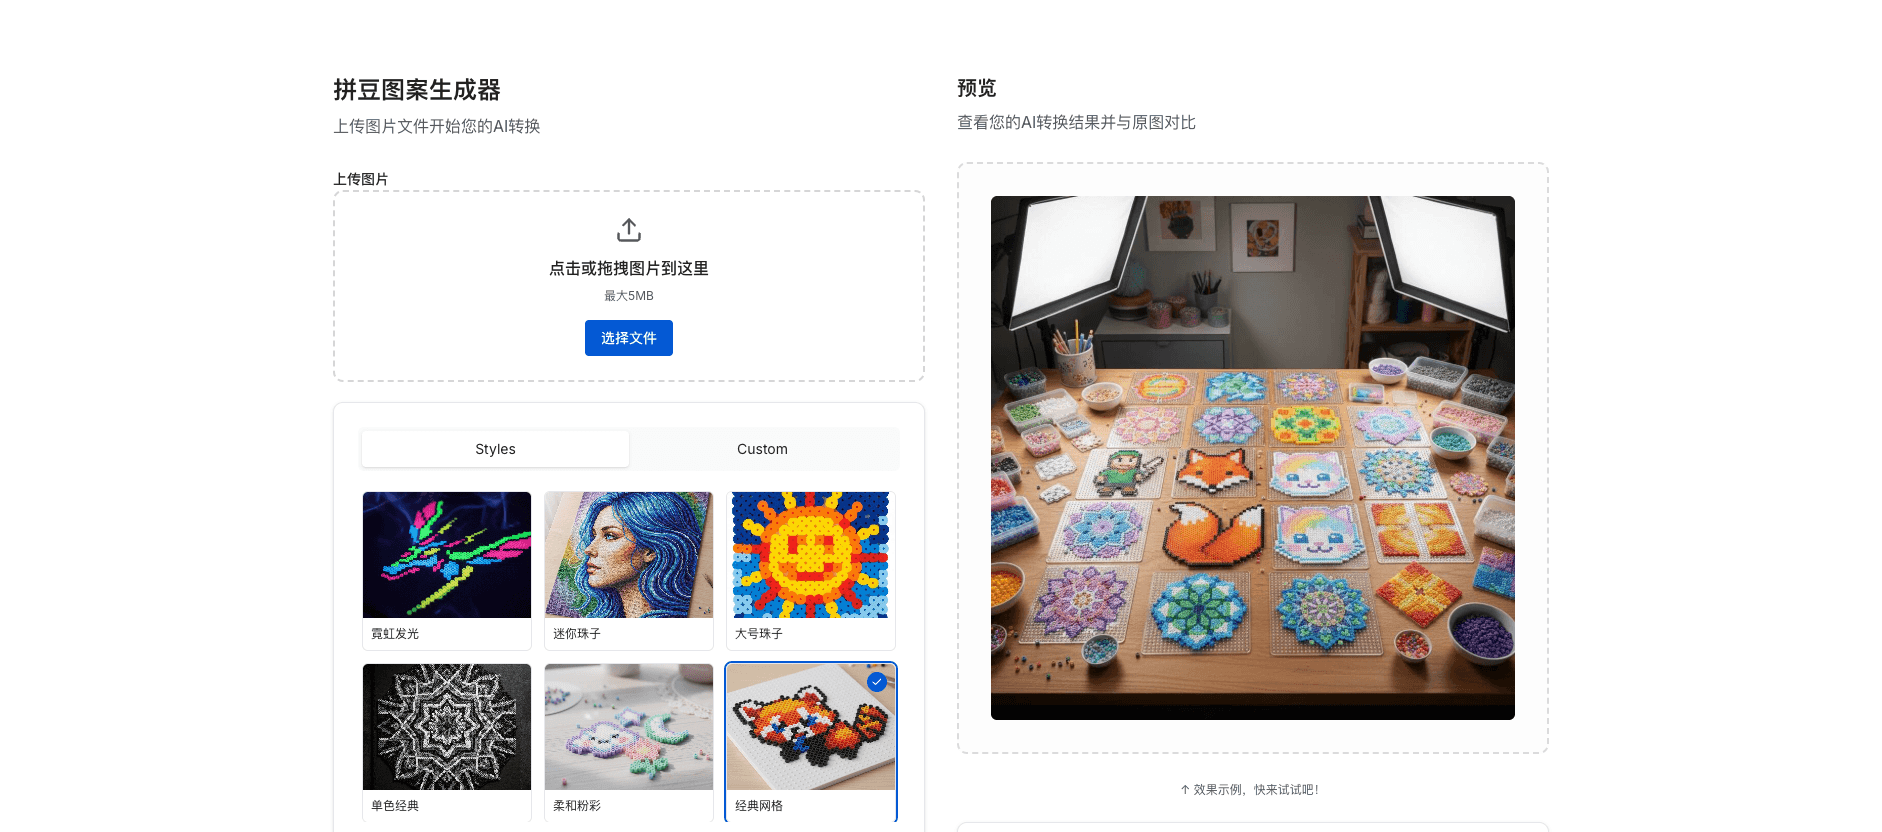
The perler bead pattern generator: upload a photo, then pick bead size and color style (SketchTo zh tool page)
Step 2: Read the pattern and print it
The downloaded pattern is a color grid: each cell is one bead, and each color maps to a code. The legend below the grid tells you how many beads of each color the design uses — that's your shopping list.
A few practical printing details:
- Color printing is easiest since you can match beads to cells directly; a black-and-white printout still works — the grid boundaries and block shapes carry the layout, and you check colors against the legend on screen.
- Fold the printout or mark it into sections so long rows stay aligned on bigger designs.
- Count your beads against the legend before you start. Running out of one color mid-project is the most common way a project dies; restocking first beats swapping colors later.
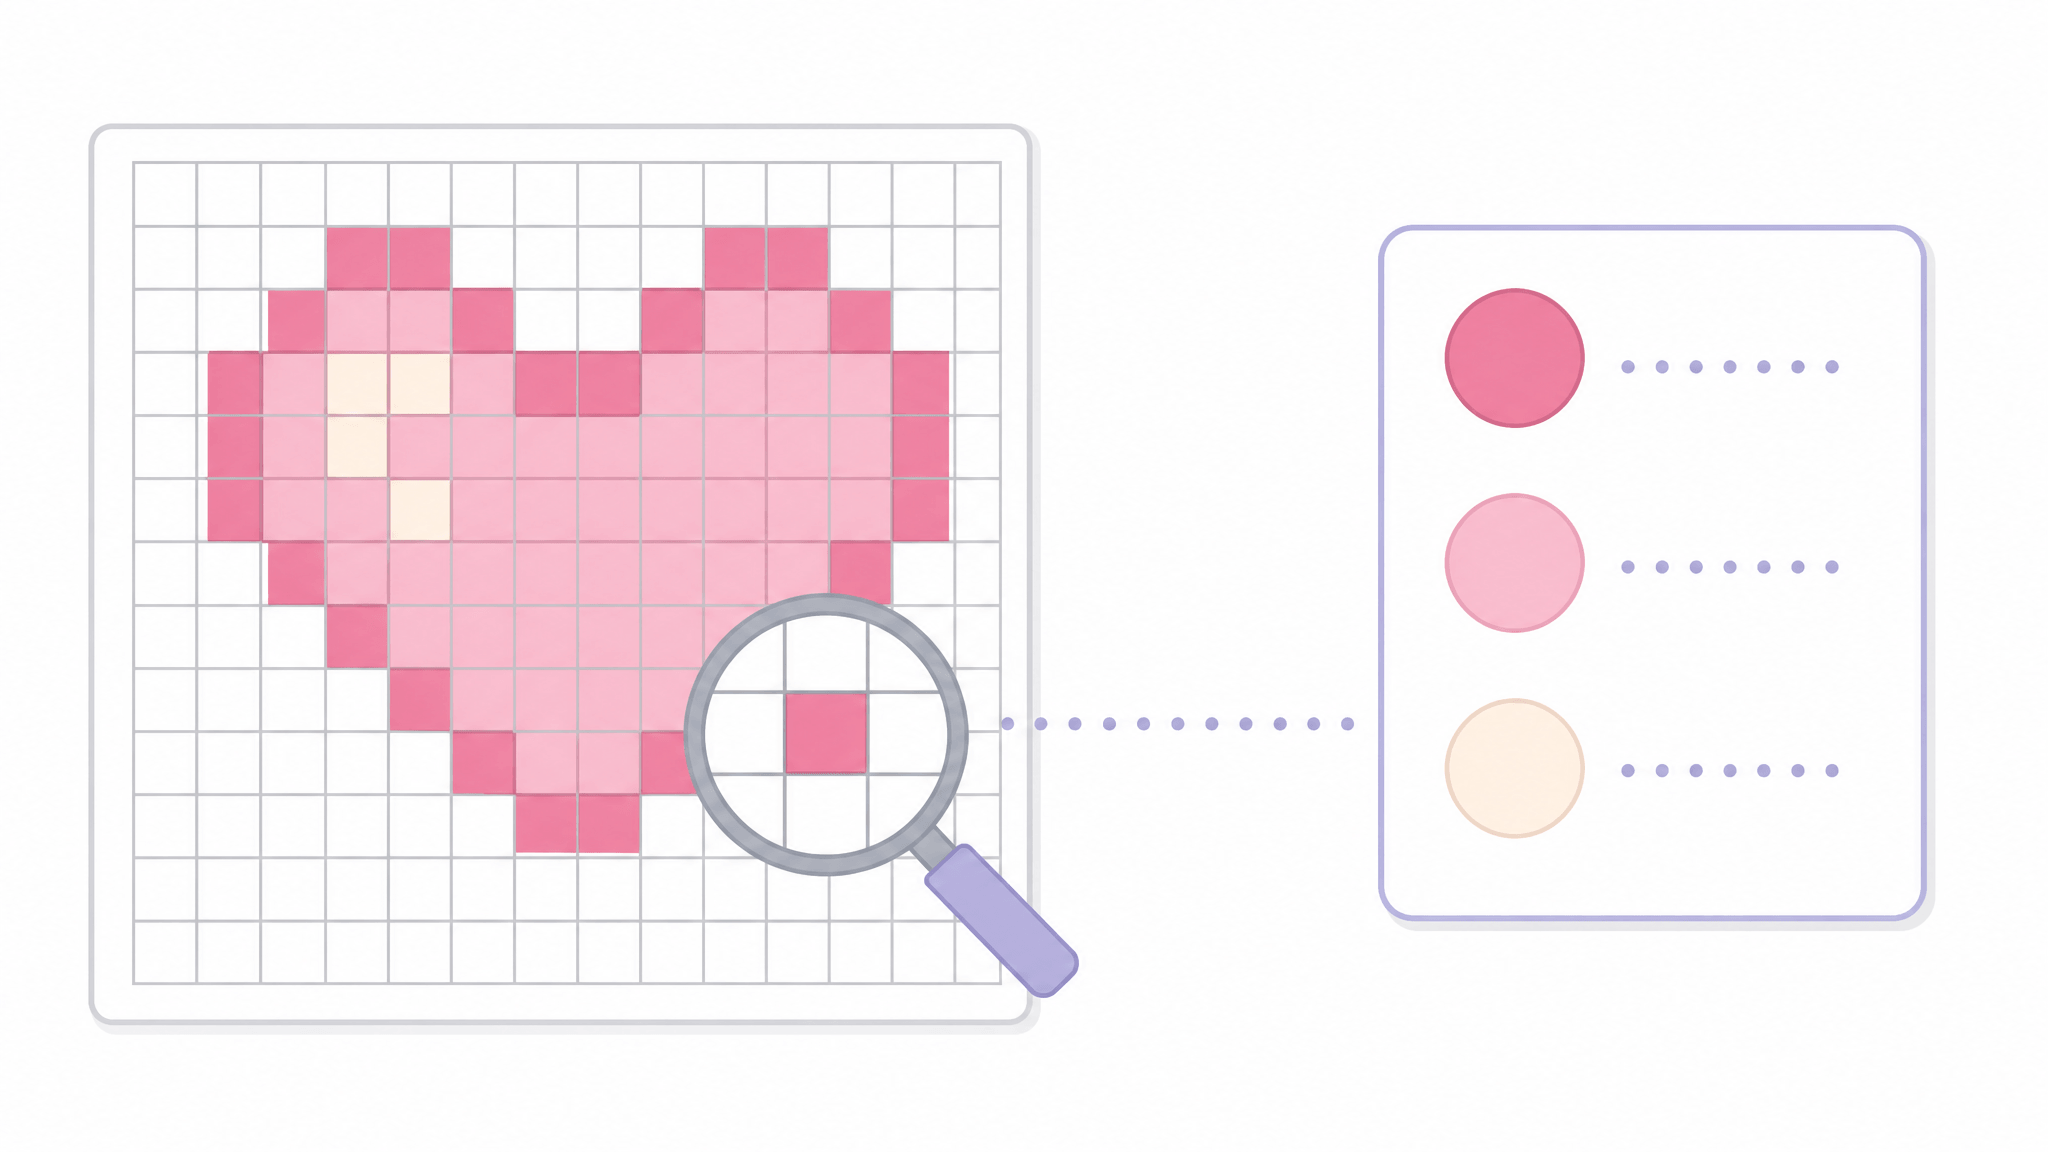
Each grid cell is one bead; the legend tells you how many of each color you need
Step 3: Choose the right beads — sizes and brands
Two things matter when buying beads: size and color codes.
Size: every major brand's standard bead is about 5mm in diameter — Perler calls it Standard, Hama calls it Midi, and Artkal's 5mm hard bead is the S series. It's the size most 29×29 pegboards and published patterns are built around, so start here. The smaller mini size (~2.6mm, Artkal C series) allows much finer detail but needs tweezers and patience; the 10mm big beads (Perler Biggie, Artkal X series) are made for young kids.
Brands and color codes: standard beads across all three brands share the same size and can sit on the same board. Artkal's own guidance says its hard 5mm S-series and 2.6mm C-series beads are compatible with Perler and Hama; its soft series (R 5mm, A 2.6mm) is recommended for separate use because of its flexible post-fuse feel. One warning: don't mix brands at the mini size — Artkal mini beads (2.6mm) don't stay seated on Hama mini boards (2.5mm pegs).
| Brand | Standard (start here) | Mini | Large | Color codes |
|---|---|---|---|---|
| Perler | Standard 5mm | ~2.6mm | Biggie 10mm | own numbering |
| Hama | Midi 5mm | Mini 2.5mm | Maxi 10mm | own numbering |
| Artkal | S series 5mm hard, 206 colors | C series 2.6mm hard, 178 colors | X series 10mm | S/C compatible with Perler/Hama |
The key point: color codes are not interchangeable between brands — the same green has a different number at each one. The pattern legend is generated from the tool's palette, so buy the closest match to each legend color rather than chasing exact numbers; the closer the match, the closer the finished piece looks to the pattern.
Step 4: Place the beads on the board
No skill required here — just two habits that make sturdier pieces:
- Work row by row (or one color block at a time) instead of jumping around the board.
- Give every bead neighbors. Hama's official instructions point out that the more beads surround a single bead, the stronger the fused design — one or two lone beads are the ones that tip over while ironing.
Big designs aren't scarier, just bigger: 29×29 boards interlock, and a 58×58 project takes 3,000+ beads across multiple boards, placed one cell at a time like any other.
Step 5: Fuse it (where projects are won or lost)
Fusing must be done by an adult. Follow the official method:
- Put the finished board on a flat, heat-safe surface and lay ironing paper over the beads.
- Set the iron to medium (Perler's standard method; Hama generally recommends the cotton setting — exact temperature varies by iron, so start low). Iron in a circular motion without pressing down, about 10–20 seconds per side. Lift a corner of the paper occasionally to check: beads whose centers are still open are done right.
- Let it cool for a couple of minutes, remove the design from the board, flip it, cover with ironing paper again, and fuse the second side. Let it cool completely.
Two common mistakes: over-ironing closes the bead centers and makes the piece brittle (Perler specifically warns against it for projects you plan to assemble later); and flipping too early with too little heat leaves beads loosely stuck that fall apart once cool. If a piece comes out warped, press it flat while it's still warm — or reheat under fresh ironing paper for a few seconds and press again once cooled.
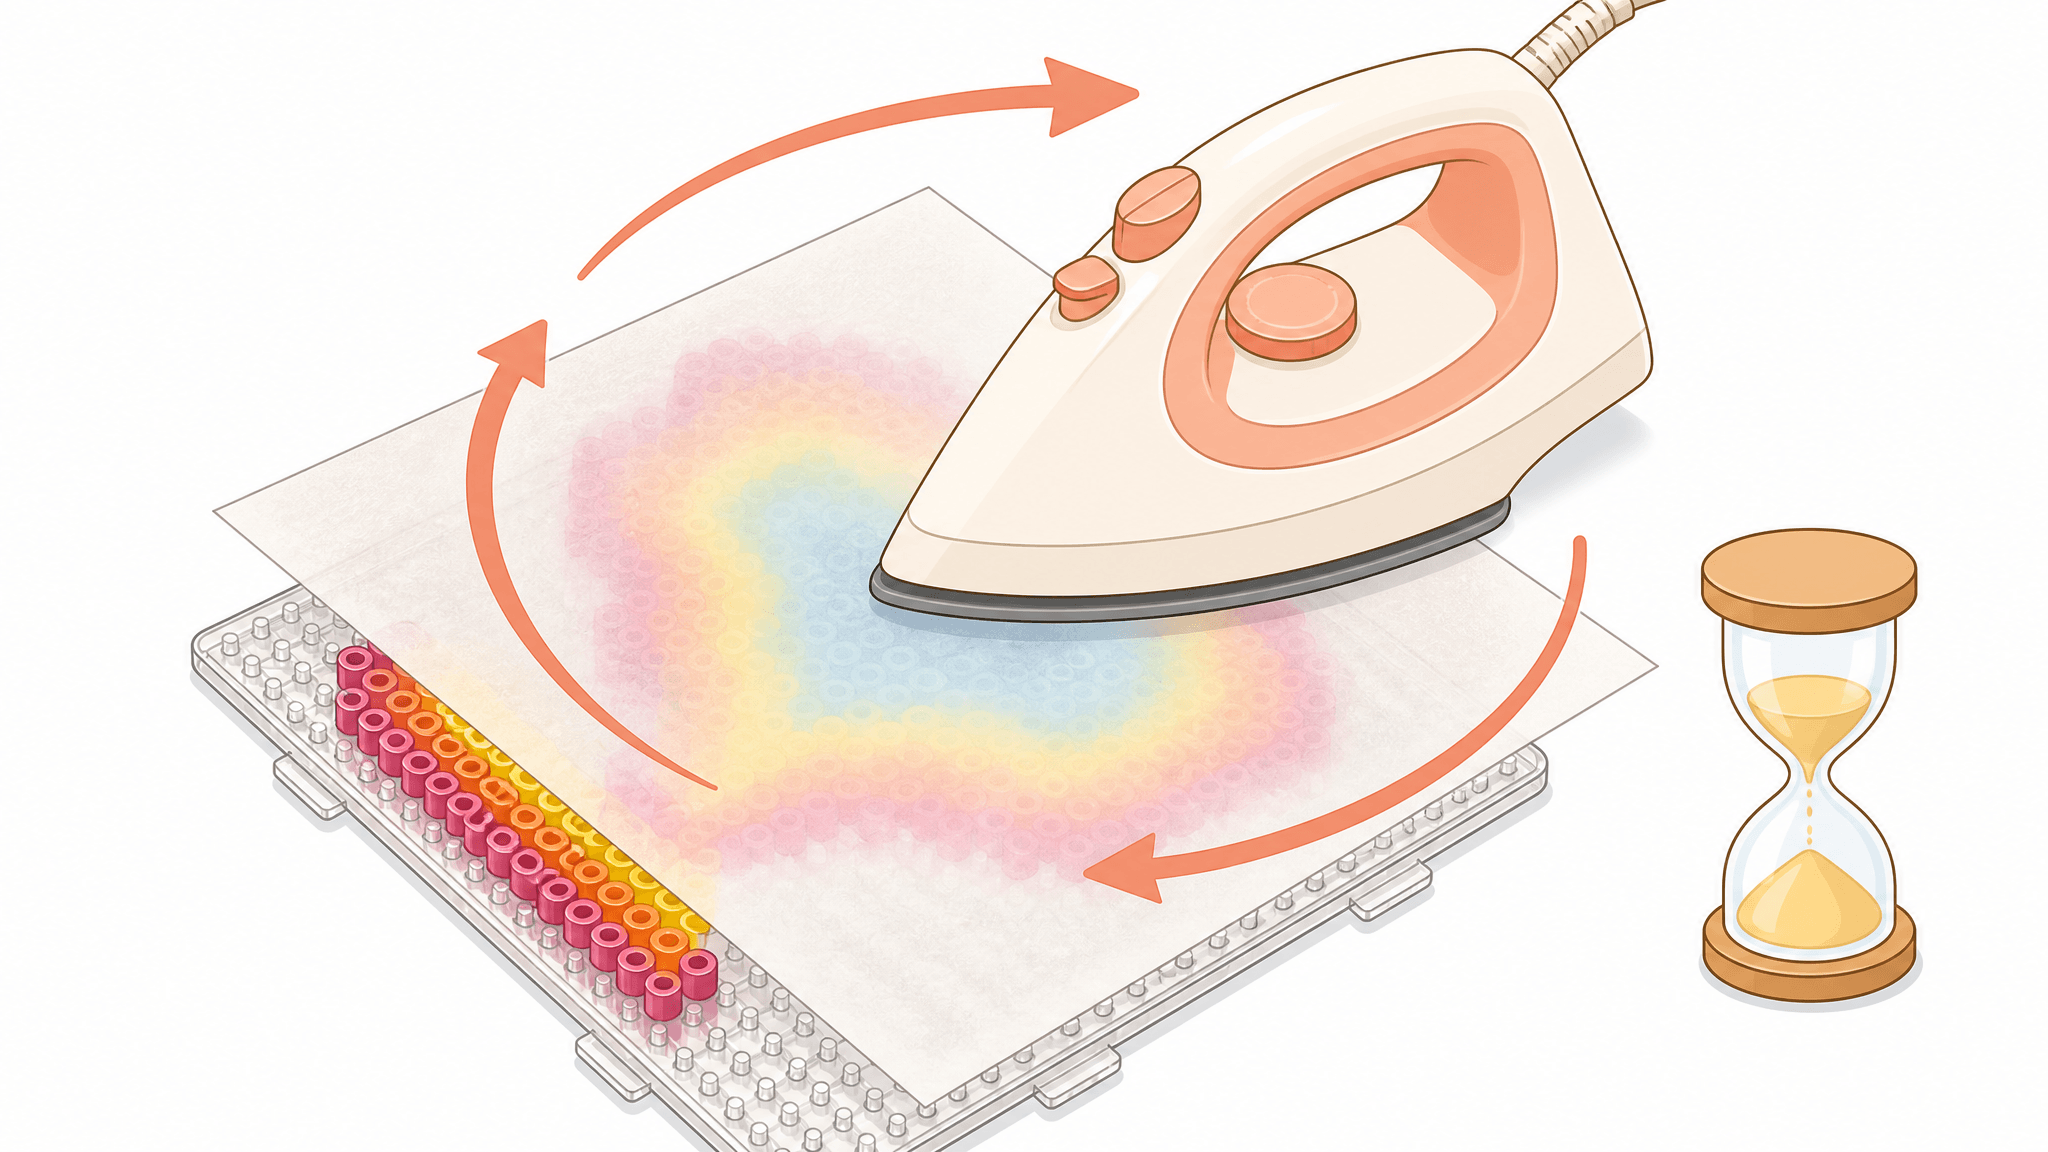
Iron in circles through the ironing paper, 10–20 seconds per side; properly fused beads keep an open center
FAQ
The generated colors don't match my beads. What now? The legend follows the tool's palette; buy the closest visual match. If a whole region is off, regenerate the pattern with a different color style and pick the version that matches your bead stock better.
How big should a first project be? One 29×29 board (~841 beads) already makes a complete piece. For a first attempt, pick a single-subject photo and the Classic Grid style for the highest success rate.
Can I substitute the ironing paper? Both official methods iron through dedicated ironing paper — it's heat-rated, reusable, and cheap, so don't skip that layer and press the beads directly.
To recap: a good photo makes a good pattern, the grid tells you where every bead goes, standard 5mm beads are the safe buy, and fusing means medium heat, circular motion, 10–20 seconds per side. Pick a photo and generate your first perler bead pattern now — signup includes two free conversions.
Transform Your Images with AI
Turn sketches into stunning images, remove backgrounds, swap faces, and more — all powered by AI.
Try Sketch To FreeShare
SketchTo Team
Tech writer covering AI tools, image processing, and creative workflows.
Related Articles
How to Create the 80s AI Photo Look: Tested Steps + Copy-Paste Prompts
Turn a photo into an authentic 80s portrait: a tested step-by-step workflow, all 9 era themes explained, 5 copy-paste prompts, and tips for a convincing result.

Image to Prompt with DeepSeek V4.1-Flash: A Beginner's Guide
DeepSeek V4.1-Flash reads images natively. Learn the documented API workflow to turn any image into a reusable AI image prompt — real prices, real limits, and a template to adapt.
Promptable Background Removal: How Text-Prompted Cutouts and Auto Inpaint Masks Work
Promptable background removal lets you name what stays instead of trusting a one-click remover. Learn binary masks vs alpha mattes, auto inpaint mask generation, and three ways to do it today.